Tuesday, October 26, 2021

Tuesday October 26th

 Moving right along, whatever that means? More cards to share and more circles or variations of circles to show you!                              


The 'dots' on the cards below are the 'waste' from the cards above. These are easy cards, but you really need a fine line glue to add the inlaid pieces. Patience is nice. Ha!


                       Showed these cards on another post. These show the bigger butterfly dies in the set. All the dies here are from  'Pocket full of Happiness.' 

                                             Thanks for looking!

                                                 Mary

Wednesday, October 20, 2021

Wednesday

 Still early, still Wednesday. I have one more 'foiling' share for you. I think it is more informative than pretty, so hope that is okay.


          You saw this one before when we features the thin stripes. The butterflies are from Pinkfresh Studio and they have a stamp set and die. Perfect. Then they have a foil stamp and stencil set. The die for the stamp set and the die for the foil stamp is the same. You either stamp or foil the butterflies, lay the die on and it cuts all at once.


          On the one above, I did use the stencil, but I don't like it. I am a copic girl! I do like the pinkfresh stencils (with every stamp ?), get real... I like the floral note and the Miss your smile add on. But I think the butterflys are too small, or just extra work. 4 or 5 stencils in the set. 
                        Thanks for looking & enjoy hot foiling!

                                       Mary

Wednesday

 More foiling! More fun. Lets just start....

                    Spellbinders die 'sweet bloom border'. Yes, these were two different colors of foil . One is a darker turquoise.


 The two cards above are made with a blush foil & the one below is made with a metallic gold.  Just need to ditch the gold charger plate!
                                    

        Thought this was cute. The 'dots' background and then the Honeybee coneflowers. Just needs a sentiment!
                                   Thanks for looking!

                                               Mary


Sunday, October 17, 2021

Sunday

Good morning! I Have more Hot foil tips, and cards to show today. Since I am waiting to photograph the cards, I will show the Pinkfresh studio Perfect sentiments die. Yes, it is a hot foil die. It has usable sentiments in a nice versatile size. For the 'hot foil', just use the plate face up on your machine, add foil face down and heat.Run through the machine of choice.  I used the rainbow foil. I honestly didn't think it would work on the glossy black paper, but it did! 


                                 Pardon the shadows!
                                        
      Decided to do an experiment with my white paper. The paper on the left is an Elizabeth Craft.. adorable scorable.. the one on the right is neenah 80# solar white. Look how crisp the coated paper looks!
     Moving right along this morning. I think I posted this picture with the Honeybee cone flower post. Well, the background will be my focus today. This is by far my favorite! It is Spellbinders 'Confetti'.

For this card the die was used 2 times,  once  on each end. The 'happy Birthday' script came with the die.                    

                 The Christmas cards were made using the foiling die one time. Most of the other cards were foiled once at each end.
           

               This is what the die looks like. 'Joy' is a nice size foil die.

                                      
                I wish I had foiled the thanks twice. That is possible if you use the hinge method.
                 Experimentation in shims or pressure you use in your machine makes a difference. Too much causes 'over'foiling. Too little makes spotty foiling. 


                     Easy and elegant. Pretty much anything 'foiled' is elegant!! So lets move on to the next post!! Ready ?
                              Again, thanks for looking! 

Saturday, October 16, 2021

Saturday!

 Not sure how far I will get with this post. Al is fixing bacon & eggs! Yum. So as soon as he calls me, I better be ready to eat!

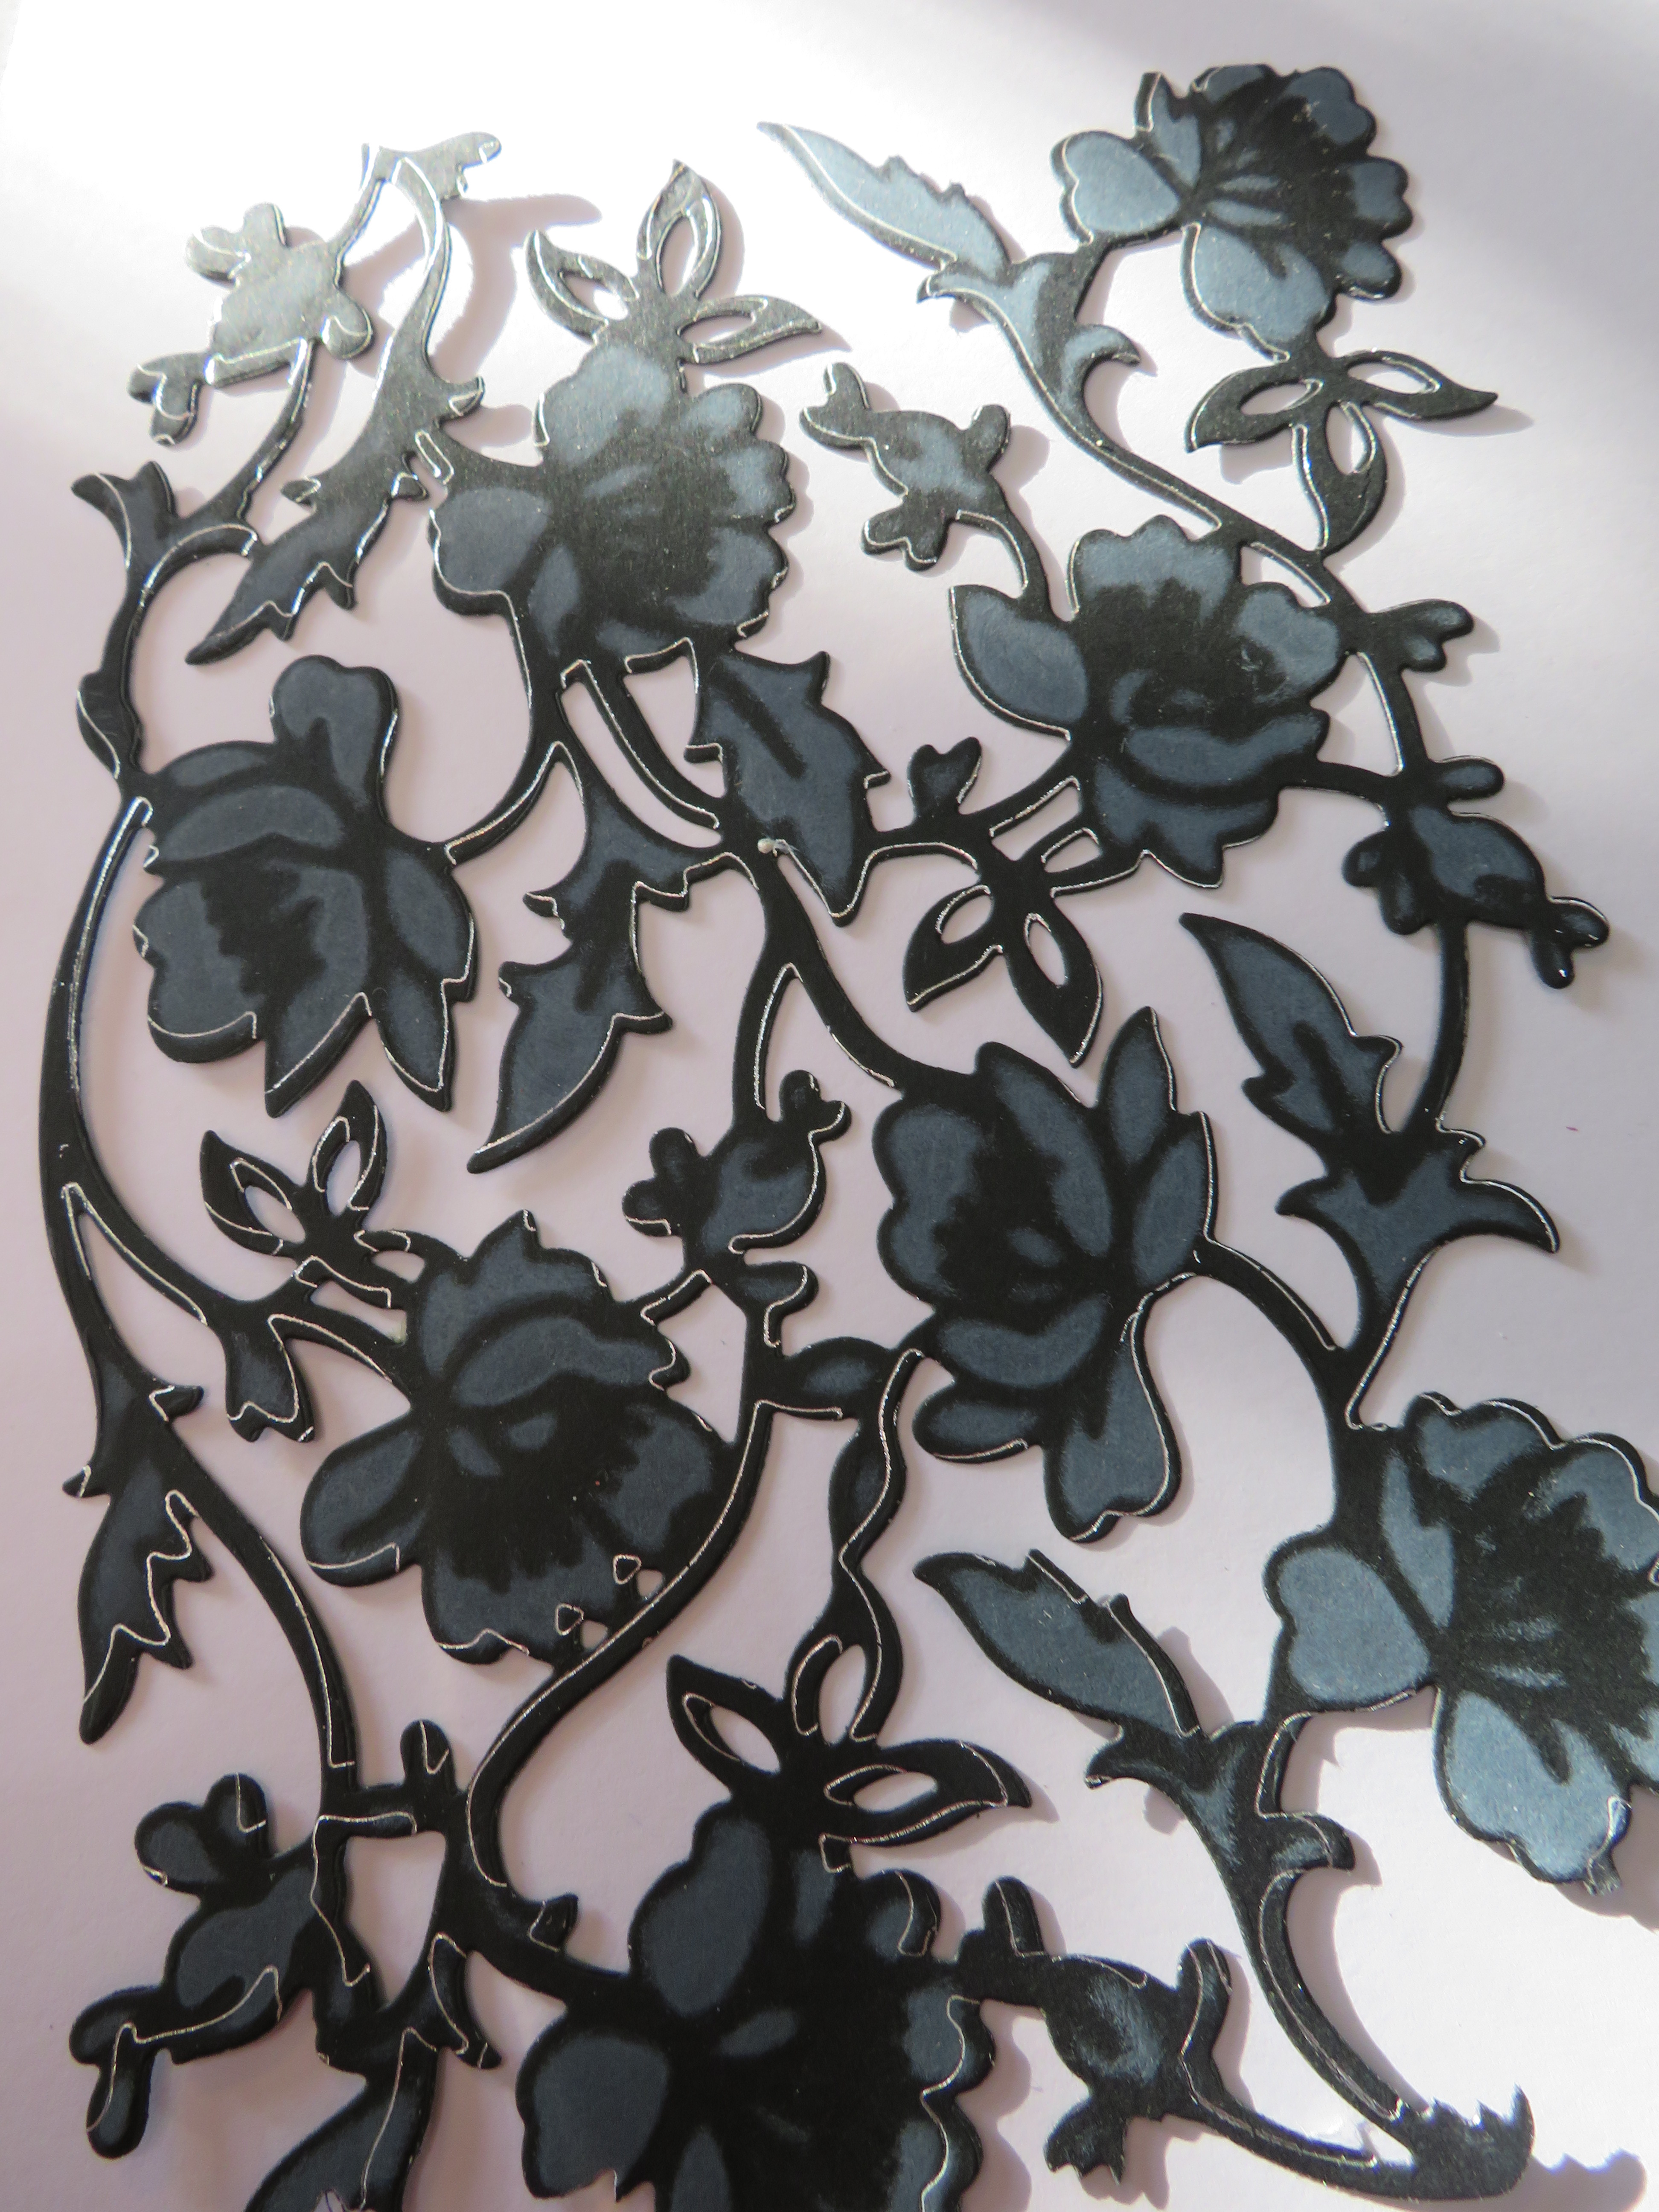
Right this minute, (the last couple hours actually) I did some experiments with  a regular die. I used a big beautiful Anna Griffith die. It is old so I can only show you a picture. It is not a 'hot foil' die.

                              This was the first attempt. I put the die cut side up, then the silver foil down and the black cs on top. Heat as directed by you machine. Yes, I was afraid it would cut the plate, but it didn't. You can see it turned out to be a line type drawing. It would still work as a backgound. 
                   Second picture shows a 'cut out' paper cut in white. Re-inserted into the die and foiled. 
                               Slight silver line on the white
                             Really pretty silver line on the black cs. Cut first and put back in the die to foil.

                 The one above was done exactly as per the instructions below, except I added some blue sponging over the white pigment. The blue was just dye ink as it was handy!

                    This one was the first 'cut out' put back in the die. Facing up on the machine. The silver foil down. Heated & finished with the Glimmer machine. Then I put the die in again & sponged white pigment ink over the black!
                   This will be it for now! Could spend all day messing with different foil, paper and dies. Oh no, another obsession!

                                      Thanks for looking!

                                            Mary